Friday, December 25, 2015

.htaccess Tips and Tricks for WordPress

The .htaccess file is a configuration file that helps us to control files and folders in the current directory, and all other sub-directories. The filename .htaccess stands for hypertext access and is supported by most servers.

Many WordPress users make use of .htaccess file when they customize their website’s permalink settings. However we can do so much more. The .htaccess file is a powerful configuration file that allows us to enhance our site’s security and performance. In this article, we will show 9 most powerful .htaccess tricks for WordPress that we can try on our site right away.
Before we start making any change, we need to backup our current .htaccess file) in a cloud storage service like Dropbox or Connect to your website using an FTP client and simply download the .htaccess file to your computer. So that, if something goes wrong, then we can upload the backup file.
If you are not able to access .htaccess file, then make sure your FTP client is set to show hidden files. If you do not have an .htaccess file in your website’s root folder, then you have to create one. Simply create a blank text file and save it as .htaccess. Make sure to name file as .htaccess and not htaccess. Lastly, you need to upload the file to your website’s root folder.

1.     Secure Your WordPress Admin Area

Admin Area Password PRotection
The wp-admin folder contains the files required to run the WordPress dashboard. In most cases, your users don’t need access to the WordPress dashboard, unless they want to register an account. A powerful security measure is to enable only a few selected IP addresses to access the wp-admin folder. You can use .htaccess to secure your WordPress admin area by limiting the access to selected IP addresses only. Simply copy and paste following code into your .htaccess file:
# Limit logins and admin by IP
<Limit GET POST PUT>
order deny,allow
deny from all
allow from x.xx.xx.xx
allow from IP_ADDRESS_2
</Limit>
Replace x.xx.xx.xx with your own IP addresses. If you are using more than one IP address to access the internet, then make sure you add them as well.

2.     Protect Your WordPress Configuration wp-config.php File from everyone

Probably the most sensitive file in your WordPress website’s root directory is wp-config.php file, which contains the database name and access credentials and various other critical data and how to connect to it. And of course, you want to disable public access to the source of all this security – the .htaccess file itself. To protect your wp-config.php file from unathorized access, simply add this code to your .htaccess file:
# Deny access to wp-config.php file
<files wp-config.php>
order allow,deny
deny from all

</files>

3.     Deny Image Hotlinking in WordPress Using .htaccess

When someone uses your site’s image, they can steal you bandwidth by hotlinking images from your website and most of the time, you’re not even credited for it. Normally, this doesn’t concern form most users. But, if you run a popular site with lot of images and photos, then hotlinking can become a major issue. You can stop image hotlinking by adding following code in your .htaccess file:
#disable hotlinking of images in WordPress
RewriteEngine on
RewriteCond %{HTTP_REFERER} !^$
RewriteCond %{HTTP_REFERER} !^http(s)?://(www.)?website.com [NC]
RewriteCond %{HTTP_REFERER} !^http(s)?://(www.)?otherwebsite.com [NC]
RewriteRule .(jpg|jpeg|png|gif)$ [NC,R,L]

4.     Disable Directory Browsing in WordPress

Directory Browsing
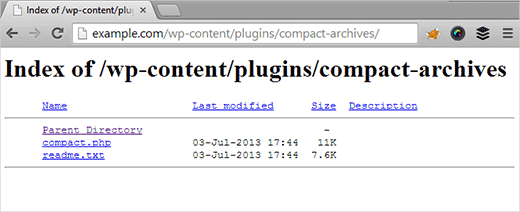
By default, the Apache web server enables directory browsing. That means all files and folders inside the root of the web server are enlist able and accessible by a visitor. With directory browsing enabled, hackers can get into your site’s directory and file structure to find a vulnerable file.
To disable directory browsing in WordPress using .htaccess all you need to do is add this single line in your .htaccess file:
# Disable directory browsing in WordPress
Options All –Indexes

5.     Allow Only Selected Files from wp-content

As you know the wp-content folder contains the all your themes, plugins and media upload. You defiantly don’t want people to access it without restrictions. In addition to denying directory browsing, you can also disable access of all file types, save a few. On the basis of this, you can selectively unblock files like JPG, DOCX, PDF, CSS, JS, etc. and deny from the rest. To do this, paste following code in your .htaccess file:
# Disable access to all file types except the following
  Order deny,allow
  Deny from all
  <Files ~ “.(xml|css|js|jpe?g|png|pdf|gif|docx|rtf|odf|zip|rar)$”>
  Allow from all
  </Files>

6.     Disable PHP Execution in Some WordPress Directories

Hacked WordPress sites usually have backdoor files sometimes. These backdoor files are often disguised as core WordPress files and are present in /wp-includes/ or /wp-content/uploads/ folders. An simple way to increase your WordPress security is by denying PHP execution for some WordPress directories. To do this, paste following code in a blank .htaccess file:
# Deny PHP Execution to all file
deny from all

</Files>

7.     Protect .htaccess From Unauthorized Access

As you have seen that there are a lot of things that can be done using .htaccess file. Due to the power and control it has on your web server, it is necessary that you also protect it from unauthorized access by hackers. To do this, paste following code in a blank .htaccess file:
# Protect .htaccess From Unauthorized Access
<files ~ “^.*.([Hh][Tt][Aa])”>
order allow,deny
deny from all
satisfy all
</files>
We can, still edit the file ourselves using FTP and through file manager of our hosting control panel.

Friday, December 18, 2015

Wordpress : Creating Tables and additional data with Plugins

Hello to everyone. Today i will show you that how to create table and additional data with plugin in wordpress. So, please follow the steps below to have your plugin automatically create its database tables:
  1. Write a PHP function that creates the table.
  2. Ensure that WordPress calls the function when the plugin is activated.
  3. Create an upgrade function, if a new version of your plugin needs to have a different table structure.
Creating Database Table:
The first step in making your plugin create database tables automatically is to create a PHP function within your plugin that adds a table or tables to the WordPress MySQL database. Lets suppose that we want to create table_for_plugin function.

Database Table Prefix:
In the wp-config.php file, a WordPress site owner can define a database table prefix. By default, the prefix is "wp_", but we'll need to check on the actual value and use it to define your database table name. This value is found in the $wpdb->prefix variable. 

So, if we want to create a table called mypluginconfig, the first few lines of your table-creation function will be:
function  () {
   global $wpdb;

   $table_name = $wpdb->prefix . "mypluginconfig"; 
}
The whole function for creating a table and adding initial data will be :

<?php

function table_for_plugin() {
 global $wpdb;
 global $jal_db_version;

 $table_name = $wpdb->prefix . 'mypluginconfig';
 
 $charset_collate = $wpdb->get_charset_collate();

 $sql = "CREATE TABLE $table_name (
  id mediumint(9) NOT NULL AUTO_INCREMENT,
  time datetime DEFAULT '0000-00-00 00:00:00' NOT NULL,
  name tinytext NOT NULL,
  text text NOT NULL,
  url varchar(55) DEFAULT '' NOT NULL,
  UNIQUE KEY id (id)
 ) $charset_collate;";

 require_once( ABSPATH . 'wp-admin/includes/upgrade.php' );
 dbDelta( $sql );

 
}

function plugin_install_data() {
 global $wpdb;
 
 $welcome_name = 'Mr. WordPress';
 $welcome_text = 'Congratulations, you just completed the installation!';
 
 $table_name = $wpdb->prefix . 'mypluginconfig';
 
 $wpdb->insert( 
  $table_name, 
  array( 
   'time' => current_time( 'mysql' ), 
   'name' => $welcome_name, 
   'text' => $welcome_text, 
  ) 
 );
}
Calling the function:

Now that we have the initialization function defined, we want to make sure that WordPress calls this function when the plugin is activated by a WordPress administrator. To do that, we will use the activate_ action hook. If our plugin file is wp-content/plugins/plugindir/pluginfile.php, we'll add the following line to the main body of our plugin:
register_activation_hook( __FILE__, 'table_for_plugin' );
register_activation_hook( __FILE__, 'plugin_install_data' );

This is how we add new table and initial data with plugin installation.

Friday, December 4, 2015

How to use ajax in wordpress

Today we will learn how to use ajax in wordpress.

Overview of How To Use AJAX in WordPress

1. Edit your custom template to include a form or javascript event that will submit data via jQuery AJAX to admin-ajax.php including whatever post data you want to pass in. Make sure jQuery is being loaded.

2.Define a function in your theme’s function.php; read post variables, and return something back to the user if you wish.

3.Add an AJAX action hook for your function.

Let’s start by creating a simple form on the front-end for entering new customer details.

Creating the Form

if (is_user_logged_in()):?>
<form type="post" action="" id="newCustomerForm">
<label for="name">Name:</label>
<input name="name" type="text" />
<label for="email">Email:</label>
<input name="email" type="text" />
<label for="phone">Phone:</label>
<input name="phone" type="text" />
<label for="address">Address:</label>
<input name="address" type="text" />
<input type="hidden" name="action" value="addCustomer"/>
<input type="submit">
</form>
<br/><br/>
<div id="feedback"></div>
<br/><br/>

The PHP Receiver

wp_enqueue_script('jquery');
function myFunction(){
//do something
die();
}

add_action('wp_ajax_myFunction', 'myFunction');
add_action('wp_ajax_nopriv_myFunction', 'myFunction');
wp_enqueue_script('jquery');

function addCustomer(){
global $wpdb;
$name = $_POST['name'];
$phone = $_POST['phone'];
$email = $_POST['email'];
$address = $_POST['address'];
if($wpdb->insert('customers',array(
'name'=>$name,
'email'=>$email,
'address'=>$address,
'phone'=>$phone
))===FALSE){
echo "Error";
}else {
echo "Customer '".$name. "' successfully added, row ID is ".$wpdb->insert_id;
}
die();
}

add_action('wp_ajax_addCustomer', 'addCustomer');
add_action('wp_ajax_nopriv_addCustomer', 'addCustomer'); // not really needed

The Javascript

jQuery.ajax({
type:"POST",
url: "/wp-admin/admin-ajax.php", // our PHP handler file
data: "myDataString",
success:function(results){
// do something with returned data
}
)};

<script type="text/javascript">
jQuery('#newCustomerForm').submit(ajaxSubmit);
function ajaxSubmit(){
var newCustomerForm = jQuery(this).serialize();
jQuery.ajax({
type:"POST",
url: "/wp-admin/admin-ajax.php",
data: newCustomerForm,
success:function(data){
jQuery("#feedback").html(data);
}
});
return false;
}
</script>

The basic structure for writing an AJAX call is as follows:
Those last two lines are action hooks that tell WordPress “I have a function called myFunction, and I want you to listen out for it because it’s going to be called through the AJAX interface” – the first is for admin level users, whilewp_ajax_nopriv_ is for users who aren’t logged in. Here’s the complete code for functions.php that we’re going to use to insert data in our special customers table, which I’ll explain shortly:
Just as before, we’re declaring the global $wpdb to give us direct access to the database.  We’re then grabbing the POST variables which contain the form data. Surrounded in an IF statement is the function $wpdb->insert, which is what we use to insert data into our table. Since WordPress provides specific functions for inserting regular posts and meta data, this $wpdb->insert method is generally only used for custom tables. 
The ===FALSE checks to see if the insert function failed, and if so, it outputs “error“. If not, we’re just sending a message to the user that Customer X was added, and echoing the $wpdb->insert_id variable, which indicates the auto-increment variable of the last insert operation that happened (assuming you’ve set a field that auto-increments, like an ID).
Finally, die() will override the default die(0) provided by WordPress – this isn’t essential as such, but without it you’re going to get 0 appended to the end of anything you send back to the template.
The final step is the magic bit – the actual Javascript that will initiate the AJAX call. You’ll notice that in the form we added earlier, the action field was left blank. That’s because we’ll be overriding this with our AJAX call. The general way to do this would be:
That’s the basic structure of AJAX call we’ll be using, but certainly not the only way you can do it. You might be wondering why we’re referring to wp-admin here, even though this will be on the front-end of the site. This is just where the AJAX handler resides, whether you’re using it for front or admin side functions – confusing, I know. Paste the following code directly into the customer template:
In the first line, we’re attaching our ajaxSubmit function to the form we made earlier – so when the user clicks submit, it goes via our special AJAX function. Without this, our form will do nothing. In our ajaxSubmit() function, the first thing we do is to serialize() the form. This just takes all the form values, and turns them into one long string that our PHP will parse out later. If it all works out right, we’ll put the returned data into the DIV with the id of feedback.

Friday, November 27, 2015

Creating Page Templates in Wordpress

Sometimes we want a template that can be used globally by any page, or by multiple pages.

To create a global template, write an opening PHP comment at the top of the file that states the template’s name.
1
<?php /* Template Name: Example Template */ ?>
It’s a good idea to choose a name that describes what the template does as the name is visible to WordPress users when they are editing the page. For example, we could name your template Homepage, Blog, or Portfolio.
This example from the TwentyFourteen theme creates a page template called Full Width Page:
1
2
3
4
5
6
7
8
<?php
/**
 * Template Name: Full Width Page
 *
 * @package WordPress
 * @subpackage Twenty_Fourteen
 * @since Twenty Fourteen 1.0
 */
basics-page-templates-03Once we upload the file to our theme’s folder (e.g., page-templates), go to the Page > Edit screen in your admin dashboard.
On the right hand side under attributes we will see template.  This is where users are able to access our global page templates.

Friday, November 20, 2015

Laravel save method problem

Laravel save() method save data to database and return inserted data with inserted id . when we save another record after one using same object, it overwrite first record instead of creating new record .

Example

1. create AbcModel.php

public function Abc extend Model{

   public function createNew($data){
       $this->abc_id = $data->id;
        $this->name = $data->name;
     
   }
}

Note : Model Abc only save first record of $users array and in second times it update first record data with second record without creating second record in table.

Solution of above problem is create object of Abc Model inside createNew() method .

public function Abc extend Model{

   public function createNew($data){
    $abc = new Abc();
       $abc->abc_id = $data->id;
        $abc->name = $data->name;
     
   }
}


2. create AbcController.php
class NotificationController extends BaseController {

     public function createAbc (){
       
        $users = array(0 =>array('id' => '1','name'=>'Ravi')
                                  1 => array('id' => '2','name'=>'Ranjan'));

      $new = new Abc();
      foreach($users as $user){
           $new->createNew($user);
        }
     }

}

Friday, November 13, 2015

Debugging Queries in Laravel 5.1

Laravel provides a fantastic database query builder and ORM system named Eloquent. It makes running queries extremely simple and allows us to get records with minimal effort. However, there may be times when we  need to build an advanced query and would like to see the actual SQL being generated.

In this tutorial let’s go through some of the ways we can easily get access to this information. Starting with the simplest methods and moving into more powerful packages.

Before we jump in let’s build an Eloquent query for a fictitious bug report that has been assigned to us:

Issue #22321
Problem: Searching users is showing to many results
Steps to reproduce: I search for "John Doe " and 
I'm getting back hundreds of results. 

As we dig into the code, we find this query that seems to be where
the problem lies:

$results = User::where(function($q) use ($request) {
    $q->orWhere('email', 'like', '%john@example.org%');
    $q->orWhere('first_name', 'like', '%John%');
    $q->orWhere('last_name', 'like', '%Doe%');
})->get();

Can you already spot the problem? If not, don’t worry as we will
start debugging this and see what is actually going on.

Simple Query Debugging

The simplest method to see the query generated is by utilizing
a ->toSql() method. All that we need to do is replace the closing
->get() with ->toSql(). Then printing out the results with the dd(),
die and dump, helper.

Here is the updated query:

$results = User::where(function($q) use ($request) {
    $q->orWhere('email', 'like', '%john@example.org%');
    $q->orWhere('first_name', 'like', '%John%');
    $q->orWhere('last_name', 'like', '%Doe%');
})->toSql();
dd($results)

Running this in the browser will give us the following generated
SQL:

select * from `users` where (`email` like ? or `first_name` like ?
or `last_name` like ?)

This method is great for quickly seeing the SQL. However, 
it doesn’t include the query bindings, only a ? for where they are
to be inserted. Depending on the complexity of the bindings, this
may be enough information for youto debug it.

Listening For Query Events

The second option is to listen for query events on the DB object.
To set this up above the query add this little helper:

\DB::listen(function($sql) {
    var_dump($sql);
});

Now when you load the page in the browser you will get the same
 output as in the simple query debugging section:

select * from `users` where (`email` like ? or `first_name` like ?
or `last_name` like ?)

DB::listen is also more advanced, and it accepts two additional
parameters to give us access to the passed in bindings and the
time the query took to run:

\DB::listen(function($sql, $bindings, $time) {
    var_dump($sql);
    var_dump($bindings);
    var_dump($time);
});

Running this again will then display the following results:

string 'select * from `users` where (`email` like ? or `first_name`
 like ? or `last_name` like ?)' (length=89)
array (size=3)
  0 => string '%john@example.org%' (length=18)
  1 => string '%John%' (length=6)
  2 => string '%Doe%' (length=5)
float 35.63

As you can see, this gives us the query, the bindings, and the
 time the query took to run. With this, we can match up the 
bindings to the query.

Debugbar Package

Another viable option is to install the Laravel Debugbar package.
 Once installed you will get a heads up overview of your app that
 is displayed at the bottom of the browser. It’s a very 
full-featured package and will give you lots of insights into 
your application.

The part we want to focus is the query tab that outputs every
query ran to generate the page.

This gives us the full query with the bindings inserted into 
the correct place and a bonus of showing query hints to 
improve it.

Another advantage of having the query shown instantly like 
this is you can quickly spot areas that might not be 
eager loaded. This can lead to a significate database 
performance hit, and it’s easy to notice as you will 
see the total number of queries being high.

Conclusion

Have you spotted the error with the query now? Instead of using
orWhere we needed to be using where. Here is the final code 
that fixes the bug:

$results = User::where(function($q) use ($request) {
    $q->where('email', 'like', '%john@example.org%');
    $q->where('first_name', 'like', '%John%');
    $q->where('last_name', 'like', '%Doe%');
})->get();

Which gives us the corrected query:

select * from `users` where (`email` like '%john@example.org%' 
and `first_name` like '%John%' and `last_name` like '%Doe%')